
Facebook’s SDK is incredibly powerful but can be confusing and overwhelming when getting started. I’m going to walk you through getting started using the Facebook SDK for JavaScript on your website, so you can include share buttons, like buttons, interact with the Graph API, or allow a user to login to your Facebook app.
Video Tutorial
I recorded a conversational tutorial video, for those of you who like to follow along visually and audibly.
Topics
- Setup Your Facebook App for Local Development
- SDK Code Snippet
- After the SDK is Loaded
- Facebook Dialogs
- Facebook Login
- Further Reading
Setup Your Facebook App for Local Development
If you want a sandbox, so you can test integration of the Facebook SDK with your Facebook app, there a few things to do.
First, open up your app settings on Facebook. The URL looks like this:
Then click Settings > Basic. At the bottom, in the Website section, enter the Site URL as “https://localhost/“. If you don’t have a Website section there, click Add Platform and select Website. Note that we entered https as the protocol. If you don’t, the Facebook SDK will log console warnings informing you that before long, you won’t be able to access the SDK via a non-secure site, so we’ll go ahead and test locally on https. After defining the Site URL, scroll back to the top and enter localhost in the App Domains input and press Enter. Click to Save Changes to finish this step.
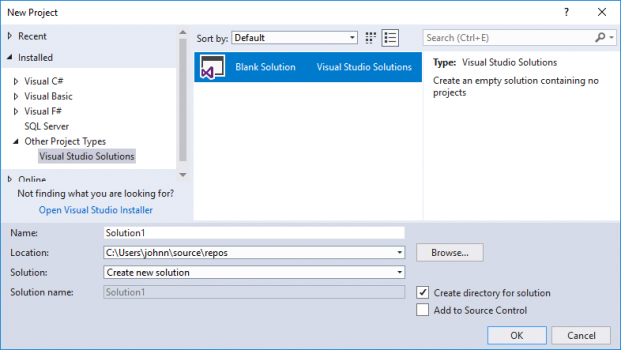
Next, access a tool like Visual Studio. That’s my code editor of choice and allows for quick and easy project setup and running of simple projects on your local computer. If you use Visual Studio, go to File > New > Project. Select Blank Solution, give it a name and location, then select Ok.
After creation, right-click on the solution name in the Solution Explorer and go to Add > Existing Web Site. Select a folder where you want your sandbox website files to go (maybe even same folder where you created your solution, then click Open.
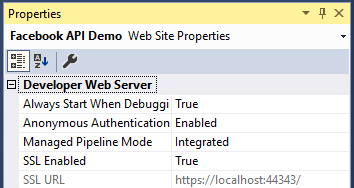
Now, remember we want to run this project on https on our local computer, so right-click the project name in the Solution Explorer and click Properties Window. In the properties, set SSL Enabled to True and take note of the SSL URL that appears. That’s how you can access your site locally on the https protocol.
Lastly, press Ctrl + F5 or click the IIS Express button in your toolbar to start the project without debugging. After the project starts, you’ll need to access your site via the SSL URL you noted earlier.
Now you’re ready to test locally!
SDK Code Snippet
To begin, you need to include the following JavaScript code snippet on your site. You can technically include this code anywhere on your site, whether in the <head> of your site or before the ending <body> tag. It isn’t blocking, since the script will be loaded asynchronously.
That code snippet first checks to see if the SDK has already been loaded, and if not, adds a script tag to your site that will load the SDK’s JS file.
After the SDK is Loaded
When the SDK JS file successfully loads, it will look for a global function called fbAsyncInit (i.e. a function called fbAsyncInit attached to the window object), so define that function before the code snippet above. It should look like this:
window.fbAsyncInit = function () {
    //FB JavaScript SDK configuration and setup
    FB.init({
        appId: '1234567890', //FB App ID
        cookie: true,  //enable cookies to allow the server to access the session
        xfbml: true,  //parse social plugins on this page
        version: 'v3.2' //use this graph api version 3.2
    });
}
Once we know the SDK has loaded, we call FB.init to tell the SDK to connect to our Facebook app, which is why you need to include your app ID. The cookie and xfbml properties aren’t required, but may be for your purpose.
Once your app is initialized, we can begin integrating some awesome features from the Faceook SDK!
Facebook Dialogs
Facebook provides a number of UI dialogs you can integrate onto your site that allow your users to share, like, or send links. You can integrate request dialogs to send game requests to your users’ friends or payment dialogs so your users can purchase virtual items for your app. There are many more, so click the link above to learn more about what is possible.
Let’s discuss a few dialogs specifically, so you get the idea how they work.
Facebook Share Button
Let’s start with a simple Facebook share button that allows a user to share a page on your site with their friends. First, include a button or image on your site:
<button id="share-button" type="button">Share</button>Then, add an event listener to detect click events on the button:
document.getElementById('share-button').addEventListener('click', function () {
    FB.ui({
        method: 'share',
        href: window.location.href
    }, function (response) {
        if (!response) {
            console.log('User did not share the page.');
        }
        else {
            console.log('User shared the page!');
        }
    });
});
Note the FB.ui call that will now occur after the user clicks on the button. The first argument of FB.ui is an object of properties to define what we want the SDK to do. We pass in a method, which is to share in this case. You also pass it an href, which in this case is the URL of the page the user is currently on. You could easily set that to a static URL as well, if you like. This FB.ui call will open the Facebook sharing dialog in a popup window and allow the user to choose how they want to share your page.
The second argument is a callback function that will be run after the user finishes with the sharing dialog popup. If the user cancels the dialog and chooses not to share your page, it will return undefined as the response. If the user successfully shares your page, it will return an empty array.
Facebook Like or Send Buttons
You can use similar code to the share button to allow users to Like your page or send your page to their Facebook friends. Create buttons like you did previously:
<button id="like-button" type="button">Like</button>
<button id="send-button" type="button">Send</button>
Then add more event listeners for those buttons:
document.getElementById('like-button').addEventListener('click', function () {
    FB.ui({
        method: 'share_open_graph'
        action_type: 'og.likes',
        action_properties: JSON.stringify({
            object: window.location.href
        })
    }, function (response) {
        if (!response) {
            console.log('User did not share the page.');
        }
        else {
            console.log('User shared the page!');
        }
    });
});

document.getElementById('send-button').addEventListener('click', function () {
    FB.ui({
        method: 'send'
        link: window.location.href
    }, function (response) {
        if (!response) {
            console.log('User did not share the page.');
        }
        else {
            console.log('User shared the page!');
        }
    });
});
Up to this point, none of these features require the user to actually login to Facebook via your Facebook app. But once you do support Facebook logins on your site, you open up a whole new world of features and capabilities to allow your users to interact with Facebook’s Graph API via your website.
Facebook Login
Before you can make calls to the Graph API using FB.api, you will need to get the user logged into Facebook via your Facebook app.
How To Get a User Logged In
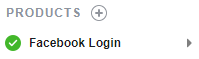
You’ll need to enable Facebook Login in your Facebook app settings. Go to your app dashboard and in the left menu under Products, click to add a new product and select Facebook Login. You won’t need to worry about the product’s settings yet, so just make sure the product is there for now.
Now we can get started on the code!
First, you’ll probably want to check and see if the user is already logged into your app when they access your page and the SDK is loaded. To do so, include a call to FB.getLoginStatus (read more about that function here) inside your window.fbAsyncInit function you defined earlier:
FB.getLoginStatus(function (response) {
    console.log(response);
});
That will instruct the SDK to see if the user is logged in, then simply log the response to the console. If the user is already logged into your app, the response.status will be the string “connected”, and you can continue making API calls for the user. But if the user is not logged in yet, we’ll need to handle that situation.
There are two primary ways to let a user login to Facebook via your app. You can try to do this automatically for the user, or you can integrate a login button on your site that the user has to click to login to Facebook via your app. You can also do both.
If you try to log the user in automatically by making a call to FB.login on page load, beware that a significant problem can occur. Because the user hasn’t done anything to initiate this call to FB.login, the popup window that loads Facebook’s login page will be blocked by most browsers. Browsers do this to keep developers from opening unwanted popup windows if the user didn’t do anything that shows intent (like click a button). If you do call FB.login on page load, you’ll likely see the pop-up blocked indicator in your browser:
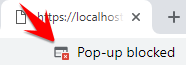
What this means is that you’ll need to include a Facebook login button on your site that users can click to initiate this whole process and not have the login popup blocked.
Facebook actually provides some baked-in login buttons that are supported by the SDK. There are two flavors of these login buttons.
The first has some interesting HTML tags and associated attributes that look like this:
<fb:login-button size="large" scope="public_profile,email" returnscopes="true" onlogin="checkLoginState();">Login to Facebook</fb:login-button>Once the SDK is loaded, it will scan the HTML on your site and replace any <fb:login-button> tags with a styled button that looks like this:

Note the onlogin attribute of that tag. That’s where you’ll define what function should be called after the user finishes logging into Facebook via your app, so you’ll need to define that. We’ll get to that in a bit.
The button above will be unstyled before the SDK loads, which you may not like. Facebook provides another method of including a login button on your site that supports a sort of loading indicator before the SDK loads:
<div id="spinner" style="background: #4267b2; border-radius: 5px; color: white; height: 40px; text-align: center; width: 250px;">Loading
<div class="fb-login-button" data-max-rows="1" data-size="large" data-button-type="continue_with" data-use-continue-as="true" data-onlogin="checkLoginState();"> </div>
<script>
var finished_rendering = function () {
console.log("finished rendering plugins");
var spinner = document.getElementById("spinner");
spinner.removeAttribute("style");
spinner.removeChild(spinner.childNodes[0]);
};
FB.Event.subscribe('xfbml.render', finished_rendering);
</script></div>This method includes an initially-styled button with the text “Loading” in it until the SDK loads, then it removes the custom CSS styles you specified, removes the “Loading” text, then Facebook’s own styling takes over.
You can read more about these Facebook-supported login buttons here.
After Logging In to Facebook
At this point, you should have some sort of login button on your site and/or are calling FB.login on your site, and those will open the Facebook login popup.
The login popup displays information about your app, what permissions you are requesting, and includes buttons to let the user accept or reject the connection:

We need to handle what happens on your site after the user does something in that popup.
You need to create a function on your site that will receive the authorization response from the SDK and handle it. We’ll call ours statusChangeCallback.
Using FB.login
If you’re making a manual call to FB.login, you’ll receive back an authorization response that needs to be passed to statusChangeCallback:
FB.login(function (response) {
    statusChangeCallback(response);
}, {
    scope: 'email',
    return_scopes: true
});
The first argument of FB.login is a callback function that will be called once the user has finished with the login popup. That callback receives one argument, which is the authorization response from the SDK, and you can pass that straight to your statusChangeCallback function.
Using Facebook’s Login Buttons
If you use one of the Facebook-supplied login buttons described above and include the onlogin attribute, the SDK will call that function when the user finishes interacting with the login popup. In that function, you can check if the user successfully logged in, then pass that authorization response to the same statusChangeCallback function:
function checkLoginState() {
    FB.getLoginStatus(function (response) {
        statusChangeCallback(response);
    });
};<a name="scopes"></a>
Requesting Permissions/Scopes
We discussed above that the first argument of FB.login is a callback function that will be called after the user interacts with the login popup. The second argument that FB.login accepts is a set of properties. Probably the most important is the scope property, as this is where you define what permissions you would like the user to approve for your app. The list of possible permissions is available in the documentation. Note that most permissions you request from users require app review by Facebook before you can actually request them live on your website. The review process can be laborsome and confusing, so be prepared. It often requires detailed explanation of why you are requesting the permission and even a screen recording of exactly how you are using it on your site.
The return_scopes property instructs the SDK to send back a list of exactly which permissions the user approved for your app. Note that even if you request certain permissions in the scope property, the user can deselect them in the login popup, and unless you set the return_scopes property to true and check the authorization response, you wouldn’t know and might try to run an API call to get data the user didn’t give you access to. You can check the granted scopes in the authorization response:
if (response.status === 'connected') {
    if (response.authResponse && response.authResponse.grantedScopes)
        console.log(response.authResponse.grantedScopes);
}
You can then check if the grantedScopes property includes the scope you requested. The property is simply a string of comma separated scopes that looks like this: "email,public_profile"
Example of Handling the Authorization Response
I’ll go ahead and include a full example of how to handle the authorization response sent back by the SDK when you check if the user is logged in. If you recall, I am calling it statusChangeCallback:
function statusChangeCallback(response, loggedInCallback) {
    console.log('running statusChangeCallback...');
    console.log(response);

    // The response object is returned with a status field that lets the
    // app know the current login status of the person.
    if (response.status === 'connected') {
        console.log('connected!');
        //since we're connected, we can now make API calls for the user
        if (loggedInCallback) loggedInCallback();
    }
    else {
        console.log('not connected');
        //The person is not logged into your app or we are unable to tell.
        //Since the user isn't connected, you could show a Facebook login button or
        //display a notice to the user on your site.
    }
}
Note that you can pass in your own callback function to run if the user is successfully logged in. That means you can continually check if the user is logged in and pass the auth response to statusChangeCallback and just pass in a function to be run if the user is already logged in.
Make API Calls for a User
Now that the user can login to Facebook via your Facebook app, you can make calls to Facebook’s Graph API to get information about the user, their account, or their assets (Pages, ad accounts, etc.).
FB.api('/me', function (response) {
    console.log('Successful login for: ' + response.name);
});
Or let’s request an additional scope upon logging in, so we can get access to the user’s likes on Facebook.
FB.login(function (response) {
    if (response.authResponse && response.authResponse.grantedScopes && response.authResponse.grantedScopes.indexOf('user_likes') !== -1) {
        FB.api('/me/likes', 'get', { fields: 'id,name,about,created_time,category' }, function (response) {
            console.log(response);
        });
    }
},
    {
        scope: 'email,user_likes',
        return_scopes: true
    });
We request the user_likes scope, and because we also set return_scopes to true, we get back the grantedScopes property in the auth response, and we can make sure the user_likes scope was approved by the user before we make the API call to get the user’s likes.
Your Turn!
What has been your experience with the Facebook SDK for JavaScript? I’d love to hear from you!
What additional questions do you have about the SDK? Is there something else I can help you with or cover? Let’s discuss below in the comments!
Further Reading